


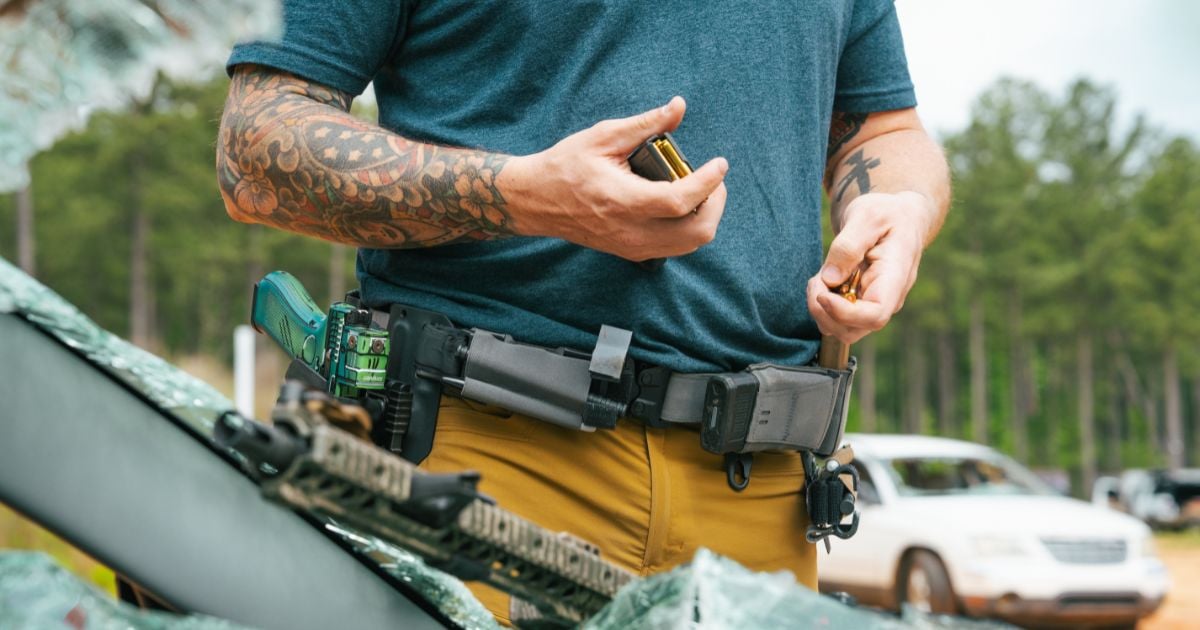
How to Build a Gear Setup That Adapts to the Task
A shooting gear loadout that works for one task can become unnecessarily heavy or crowded when your needs change. If you need to add gear to your setup, the question is not simply where you can fit it. Consider when you need it, how it affects the equipment you already carry, and whether you can remove it when your task changes.
Building around a consistent baseline and adding specialized gear only when needed gives you a loadout that can adapt without requiring a complete rebuild.
Separate Your Baseline Loadout From Conditional Gear
A baseline shooting setup should contain the equipment that consistently makes sense for how you use it. These are the items you expect to need regularly enough to justify giving them permanent space.
Conditional gear serves a clear purpose too, but only under certain circumstances. You might add it for a particular role, task, training session, or operating condition, then remove it when that need goes away.
Instead of asking, “Could I possibly need this?” ask, “Do I need this often enough for it to occupy this space permanently?”
That distinction gives you a way to decide what stays and what gets added only when needed.
Keep Frequently Used Equipment Consistent
Gear you rely on regularly benefits from a predictable location. You know where it is, and you are not moving other equipment around every time your requirements change. The new item should work around your baseline gear rather than forcing you to rebuild it when the task changes.
Add Conditional Gear Only for a Defined Need
Before attaching another pouch or piece of equipment, identify what changed. For example, you might need something different because of:
- A different task: The work requires equipment you normally do not carry.
- A different role: Your responsibilities have changed what you need available.
- Additional equipment requirements: The situation calls for an item outside your normal setup.
- A training objective: A particular session requires gear that is not part of your usual configuration.
- Additional capacity: You have a specific reason to carry more than your baseline provides.
- A different environment or operating condition: The conditions change what equipment makes sense.
If you cannot identify what changed that created the need, reconsider whether the item deserves space in your setup. It may be “just in case” gear rather than equipment that supports what you are doing.
How To Add Gear Without Redesigning Your Setup
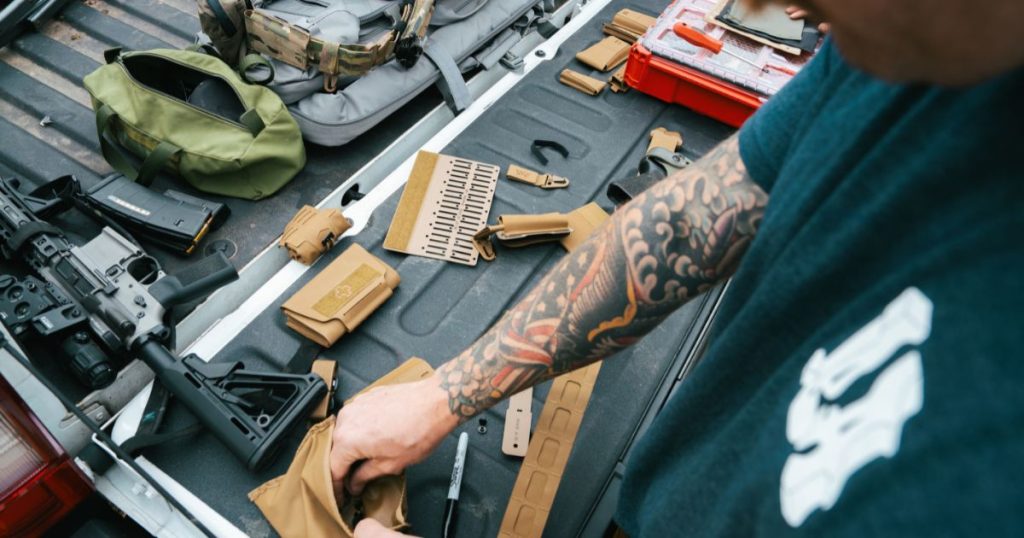
Once you decide a piece of gear is necessary for a particular task, the next question is how to add it without disrupting your baseline. The right mounting method or location can give you extra capability while preserving the gear setup that already works for you.
Use Quick-Attach Options for Gear You Do Not Always Need
Some equipment needs to be available for certain tasks, but does not justify permanent belt space. In those cases, consider whether you can make the mounting method conditional too.
For example, Blue Alpha’s Belt Adapter lets you attach compatible gear to a belt when you need it. Instead of dismantling your existing setup to make room, you can add or remove that equipment as your requirements change.
For a closer look, read How to Add or Remove Gear Without Rebuilding Your Belt Setup and Build a Capable Battle Belt Without Carrying More Gear.
Look for Low-Profile Ways to Add Specialized Equipment
Sometimes an item belongs on your setup, but its mounting method takes up more room than necessary. A useful piece of equipment becomes less useful if its mounting solution creates problems for the rest of your setup.
So a lower-profile option can help preserve space and limit interference with nearby gear. Blue Alpha’s Dump Pouch is designed to mount lower on your belt. This allows you to attach additional MOLLE gear above, keeping it out of the way of other gear.
Redistribute Gear Before You Build Outward
If you use a plate carrier and one area is getting crowded, adding another layer is not your only option. Look at whether some equipment can use available space elsewhere instead.
Rear storage may make sense for certain gear, particularly when keeping the front or sides less crowded matters. It does come with tradeoffs involving access and compatibility, so placement should still match how you plan to use the equipment.
You can also look for ways to use mounting areas that would otherwise go unused. Blue Alpha’s Wing Adapter, for example, creates additional mounting space behind a plate carrier placard rather than automatically requiring another pouch stacked on the front.
Check out our other guides for more on mounting placement and location:
Is Rear Magazine Storage Right for Your Plate Carrier?
How to Increase Magazine Capacity Without Stacking Your Placard
Put New Gear Where It Creates the Least Interference
Once you know how you want to add equipment, decide where it can go without creating problems elsewhere. An open MOLLE or belt section is not automatically a good mounting location.
Consider how the new gear affects:
- Access to existing equipment: Make sure the addition does not block or crowd something you already need to reach.
- Draw stroke: Belt-mounted gear should not interfere with clear access to your holster.
- Magazine access: Check whether nearby pouches make magazines harder to grip or remove.
- Movement: Watch for equipment that restricts bending, twisting, or other movements you regularly make.
- Sitting: Gear that feels unobtrusive while standing may press into your body or other equipment once seated.
- Kneeling and prone positions: Changes in body position can make added bulk more noticeable or put equipment between you and the ground.
- Vehicle use: If vehicles are part of your use, check how the placement interacts with seats, seat belts, and limited space.
- Plate carrier and belt interaction: Equipment on one can overlap, press against, or block equipment on the other.
- Other equipment: Packs, outerwear, and anything else you regularly wear can change whether a mounting location works.
A pouch can be easy to reach while you are standing still but becomes a problem as soon as you sit, kneel, or put on the rest of your equipment. A good location gives the new equipment the access it needs without making the rest of your setup harder to use.
Test the Whole Loadout After Every Meaningful Change

After any meaningful change, put on your loadout and test it rather than judging the addition by fit alone.
Check Access Before and After Adding the Gear
Start by checking whether you can reach everything you expect to use. Compare access before and after the addition so you can spot problems the new gear created.
Check your:
- New equipment
- Magazines
- Medical equipment
- Holster and firearm
- Other priority gear
Pay attention to more than whether you can reach an item. Notice whether the addition changes your grip, blocks part of the draw path, or forces you to reach around another pouch.
Move in the Positions You Use
Next, move beyond a standing access check. Walk, kneel, sit, bend, and use other positions that are relevant to you.
As you move, look for:
- Gear shifting out of position
- Pouches colliding with each other
- Restricted movement
- Uncomfortable pressure points
- Equipment catching on clothing or other gear
- Added bulk becoming noticeable in certain positions
A small addition can feel insignificant while you are standing, but become much more disruptive once your body position changes.
Test It With the Rest of Your Equipment
Finally, test the setup as a complete system. A belt that works well on its own may behave differently once you add a plate carrier, pack, outerwear, or other equipment.
Put on the combinations you expect to use and check how they interact. Look for overlapping pouches, blocked access, pressure between equipment, or changes in how the gear sits on your body.
Testing everything together tells you whether the new gear fits your loadout, not simply whether it fits on your belt or plate carrier.
Build Your Setup Around What You Actually Need
The goal is not to fit as much gear as possible onto a belt or plate carrier. It is to make sure every addition serves a purpose without compromising the rest of the setup.
Explore Blue Alpha’s belts, adapters, mounting solutions, and plate-carrier accessories to build a setup that can adapt without requiring a complete redesign.