


Choosing the Best Way to Carry a Breaching Rescue Bar
The BRB (Breaching Rescue Bar) is designed to solve a simple problem: keeping breaching capability close and accessible without relying on large tools or bulky setups. As laminated vehicle glass becomes more common, compact tools like the BRB are becoming more relevant for fast-access rescue, entry, and leverage tasks.
But carrying the tool is only part of the equation. Where you mount it, how secure it stays during movement, and how consistently you draw it all affect how useful it actually becomes in practice.
What Matters Most When You Carry a BRB
Three things matter most: access, retention, and interference. If one of these fails, the tool becomes harder to use when you need it.
Access: Can You Deploy It Without Thinking?
You shouldn’t have to look down or adjust your grip to grab your BRB. Access needs to be automatic.
- One-handed retrieval – You may not have both hands free. Your setup should let you pull the bar cleanly with your dominant or support hand.
- Consistent draw path – The motion should be the same every time. This helps build speed through repetition.
Retention: Will It Stay Secure Under Movement?
Movement is where weak setups fail. Your BRB should stay secure during running, climbing, kneeling, and positional changes.
- Controlled retention – Retention should be strong enough to prevent shifting or bouncing without making the tool difficult to draw.
- Stable positioning – A properly mounted BRB stays in place, so your draw remains repeatable under stress.
Interference: Does It Get in the Way?
Where you place the BRB affects everything else on your kit. You want the BRB to stay out of the way until you need it.
- Snagging on gear – Loose edges or exposed placement can catch on straps, door frames, or obstacles.
- Blocking other tools – Poor placement can interfere with mags, medical gear, or comms.
- Movement restrictions – A bad position can limit bending, sitting, or getting into tight spaces.
Let’s now take a look at the two main ways you can carry your BRB.
Loose Carry: Fast Access, Higher Risk
Loose carry is exactly what it sounds like. The BRB is tucked into a belt, clipped to gear, or secured with a strap. It’s simple, and it feels fast right away.
Why Some Users Prefer It
If you’re standing still or working in a predictable space, this feels like the fastest option.
- Immediate access – The bar is exposed and easy to grab, with nothing in the way.
- No additional gear required – You can run it with what you already have, no setup needed.
Where Loose Carry Breaks Down
The problem isn’t access, but control. Loose setups don’t hold the tool in a fixed position.
- Increased drop risk – Movement, bumps, or gear shifts can knock the bar loose.
- Inconsistent positioning – The bar doesn’t sit the same way every time, which slows your draw.
- Harder to control during movement – Running, climbing, or working around obstacles makes the tool shift or bounce.
When It May Still Make Sense
Loose carry isn’t always the wrong choice. It depends on how and where you’re using the tool.
- Short-duration tasks – When you only need the BRB for a quick job and won’t be moving much.
- Controlled environments – Flat ground, open space, and limited obstacles reduce the risk.
In these situations, simplicity can work. But once movement, gear, or obstacles come into play, the downsides become harder to ignore.
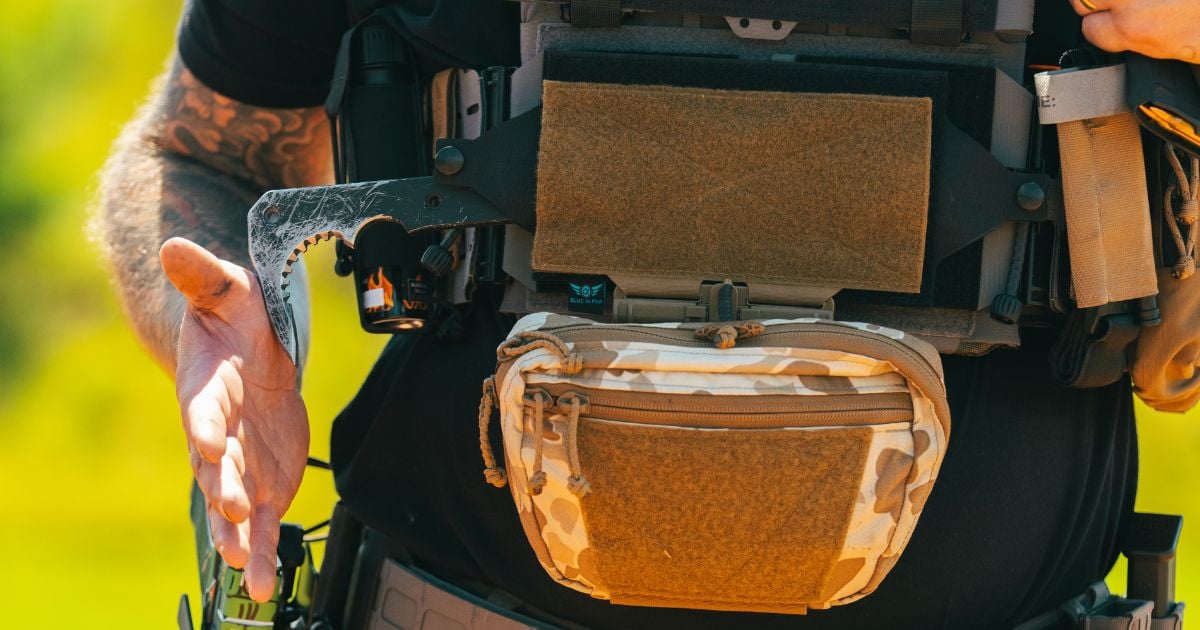
Pouch Carry: Controlled Access with Better Retention
A dedicated pouch changes the BRB from a loose tool into a fixed part of your setup. That shift matters once you start moving, working around obstacles, or trying to access the tool under pressure.
This is where a purpose-built option like the Blue Alpha BRB Pouch starts to make sense. Designed plate carrier setups and MOLLE compatible, it keeps the BRB secure, accessible, and consistently positioned without adding bulk to your kit.
How a Dedicated Pouch Changes the System
A purpose-built BRB pouch does two simple but important things:
- Fixed placement – The bar sits in the same position every time, whether you’re standing, running, or getting in and out of a vehicle. This helps you build muscle memory.
- Predictable draw – The motion to grab and deploy the bar stays consistent. That familiarity is what makes access faster over time.
Retention Without Over-Securing
A good pouch holds the BRB in place without turning access into a two-step process.
- Secure hold that still allows fast access – The bar stays put during movement, but releases cleanly when you grab it.
- Balanced tension – Enough retention to keep the BRB secure during movement without slowing down the draw
This balance is what separates a usable setup from one that looks secure but slows you down in practice. The Blue Alpha BRB Pouch is designed to balance retention and access, keeping the tool secure during movement without slowing deployment.
Reduced Snag and Interference Risk
Loose carry often creates extra edges and movement points. A pouch cleans that up.
- Cleaner integration with other gear – The BRB sits tight against your kit instead of hanging or shifting.
- Lower snag risk – Fewer exposed angles means less chance of catching on door frames, straps, or obstacles.
- Less interference with other tools – A defined position helps keep mags, medical gear, and other equipment accessible.
The goal is to carry the BRB in a way that works with the rest of your setup.
Carry Positions for the BRB
The right spot depends on your role, your movement, and the rest of your gear.
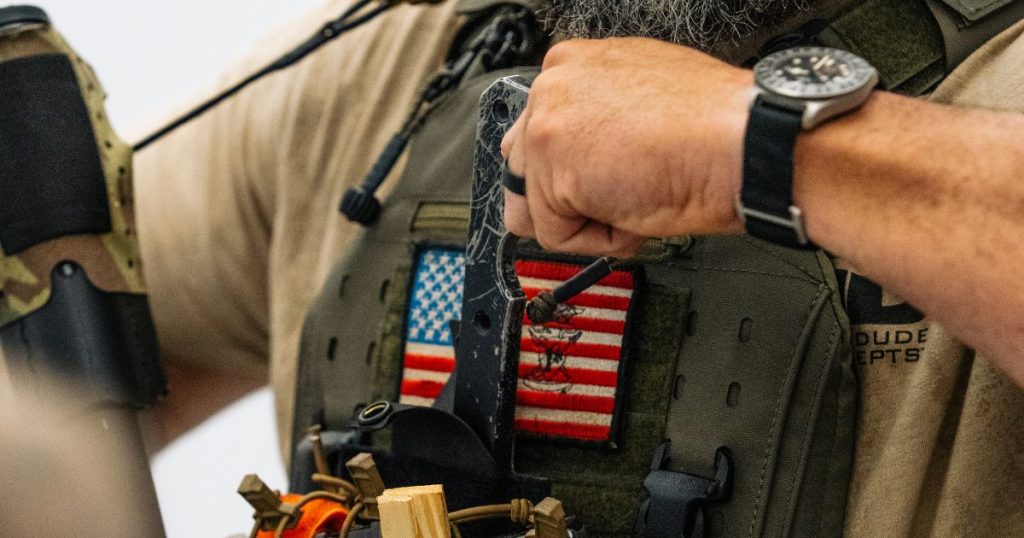
Dominant Side vs Support Side
There’s no single “correct” side. What matters is that the draw feels natural and repeatable.
- Dominant side – Faster, more natural draw. This works well if the BRB is a primary tool in your workflow.
- Support side – Keeps your dominant hand free for other tasks. This is useful if you’re managing a primary tool and need the BRB as a secondary option.
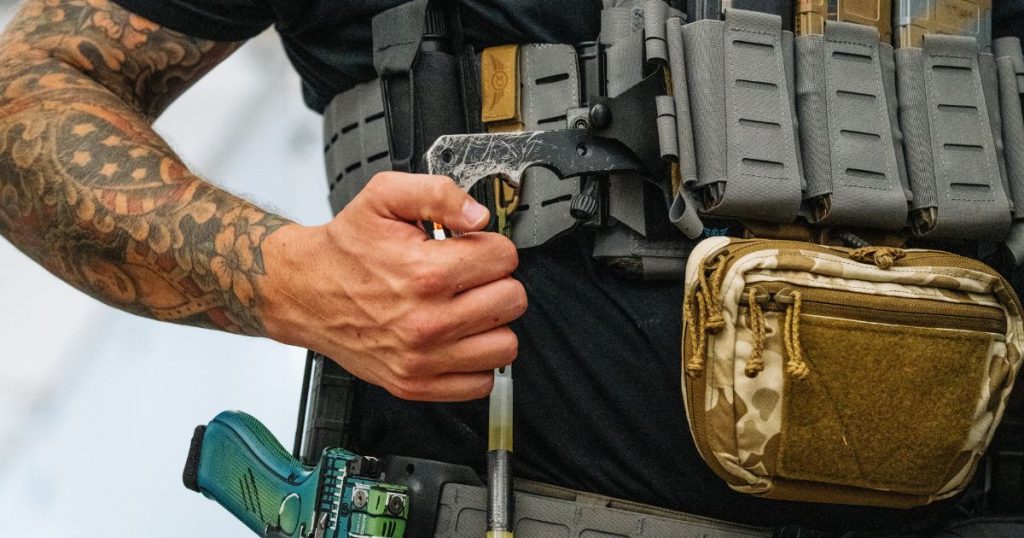
Mounting on a Belt vs. a Plate Carrier
Next, think about where it sits on your kit.
- Belt – Easier to reach and faster to access. The trade-off is more exposure to movement, which can lead to shifting or bouncing.
- Plate carrier – More stable and closer to your centerline. This reduces movement, but the draw angle may feel less natural at first.
Both work, so the difference comes down to how much you move and how quickly you need the tool.
Adjusting for Your Workflow
Your environment will shape the best setup more than anything else.
- Vehicle entry and exit – Make sure the BRB doesn’t catch on seats, doors, or seatbelts.
- Movement through tight spaces – Check for snag points in doorways, hallways, or cluttered areas.
- Interaction with other equipment – The BRB shouldn’t block mags, medical gear, or anything you need to reach quickly.
Set it up, then test it in real movement. You’ll quickly see whether it works or needs to move.
Build a BRB Setup That Works Under Movement
There’s no single perfect setup for everyone. Belt carry, plate carrier mounting, loose carry, and pouch carry all come with tradeoffs. The important part is testing your setup in real movement and adjusting it until the tool feels predictable and easy to access.
Explore the Good Dude BRB and Blue Alpha’s Breaching Rescue Bar Pouch to build a system that stays ready.