


Training Drills to Stress-Test Your Tourniquet and Med Pouch Setup
A tourniquet or medical pouch can look perfectly placed on a belt and still fail when stress hits, whether because access slows, gear shifts, or hands miss what they’re reaching for. But that’s not a gear problem. It’s a training gap.
What Makes a Med Pouch and Tourniquet “Work” Under Stress?
Under stress, your med gear works if you can reach it fast, grab it cleanly, and deploy it without looking – no matter which hand you’re using or how you’re moving.
- Accessibility with either hand. Injury doesn’t always give you a choice. Your dominant hand may be busy, injured, or pinned. A med pouch and tourniquet setup should be reachable with either hand without twisting, digging, or removing other gear.
- Consistency of placement. If your tourniquet lives in one spot today and another tomorrow, you’re adding hesitation. Keeping your medical gear in the same location every time helps build reliable muscle memory.
- Retention during movement. Gear that’s easy to grab still has to stay put. Running, kneeling, climbing, or going prone shouldn’t loosen your tourniquet or med pouch. Training while moving exposes weak retention early.
- Clear indexing without visual confirmation. Under stress, you may not be able to look down. Your hand should be able to locate exactly where to go and orient the pouch or tourniquet by feel alone. Distinct pull tabs, predictable angles, and repeatable hand placement all help you index gear without visual confirmation.
Common Med Pouch Placement Options And What to Test
There’s no universal “best” placement. What works is what you can access fast, keep secure, and repeat under stress.
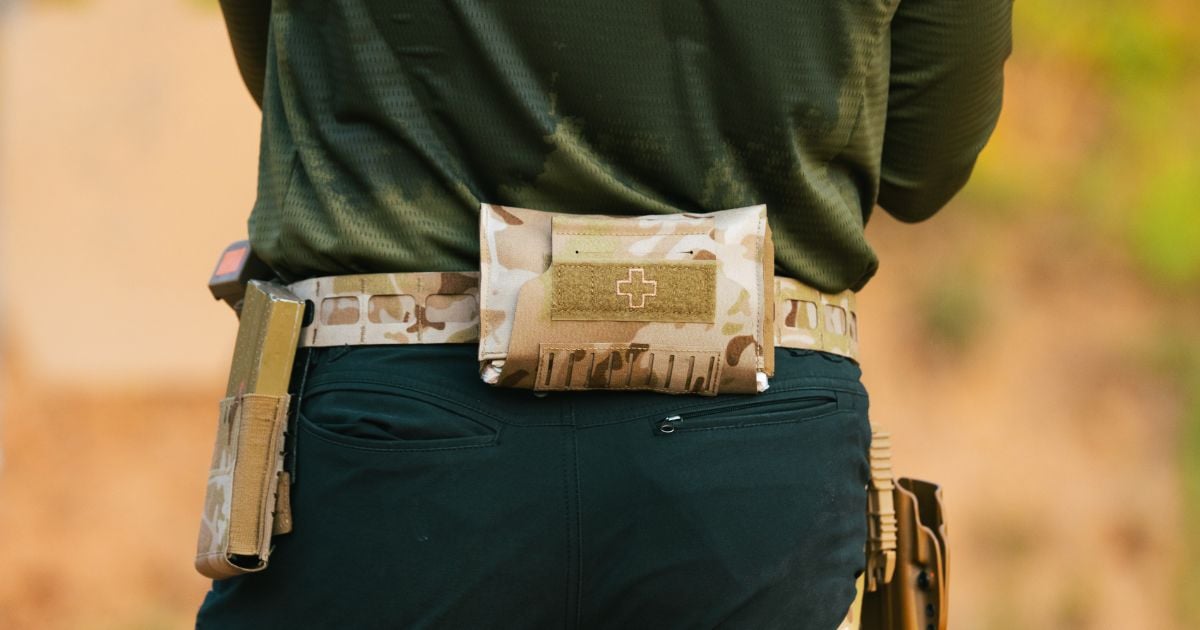
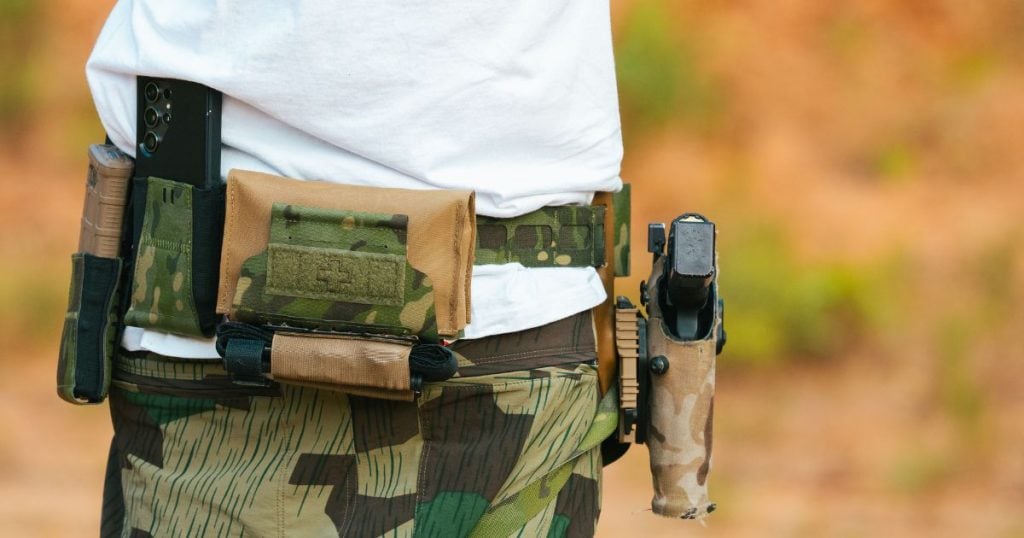
External Mounted Med Pouches
External-mounted med pouches sit outboard of the belt, projecting away from the body. They are easy to see and grab.
Faster access vs. snag risk: Mounting a med pouch on the outside of your belt is often the quickest way to reach it. The tradeoff is exposure. External pouches are more likely to catch on seatbelts, door frames, brush, or other gear, so retention and placement matter more.
When external mounting makes sense: External mounting is ideal when you require clear, unobstructed access and frequently wear gloves or operate at high speed. It’s common for duty use and structured training where access consistency matters more than concealment.
When bulk becomes a liability: Extra bulk can work against you in vehicles, tight spaces, or when layering clothing. Training drills should include seated access, movement through doorways, and going prone to see if that bulk slows you down or shifts your belt.
Low-Profile Med Pouches
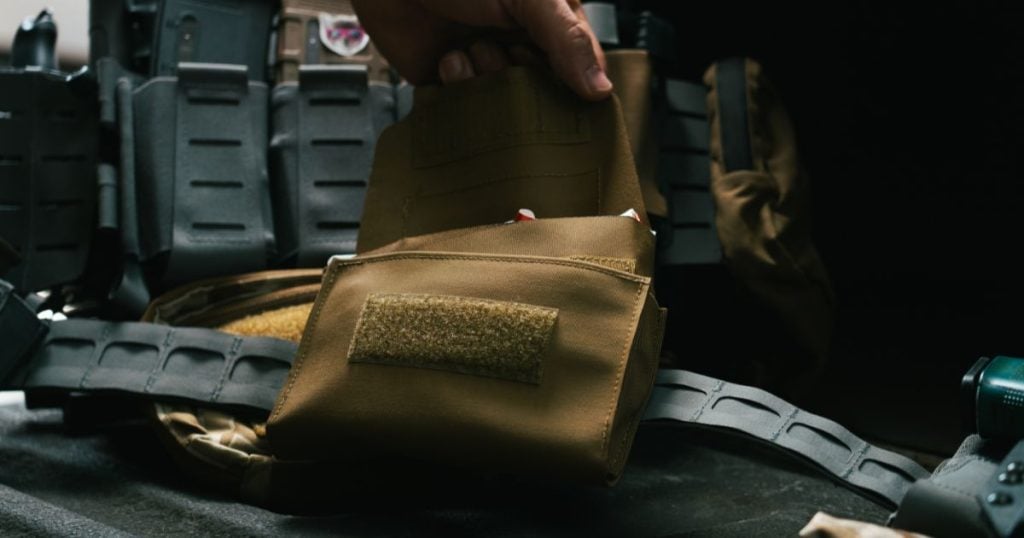
Low-profile med pouches stay within the belt’s footprint to reduce bulk, movement, and snag risk.
Reduced profile: Low-profile setups sit closer to the body, improving comfort during extended wear. The lower profile is especially helpful when moving through tight spaces or wearing outer layers.
Slightly slower access tradeoffs: The downside is often a fraction of a second delay during access. If access requires more precise hand placement, stress can magnify that delay. This isn’t always a dealbreaker, but it’s worth testing.
Why consistency matters more than speed alone: During stress, reliable muscle memory often takes precedence over raw speed. So a setup that’s slightly slower but always in the same place often beats a faster option you struggle to index consistently.
Safety and Training Disclaimer (Read Before Practicing)
These drills are designed to help you assess gear placement and access, not to simulate actual medical treatment.
- Use training tourniquets only. Never practice with a live, duty-use tourniquet. Training models are designed for repetition without causing harm.
- Avoid full occlusion during practice. The goal is to access and stage the tourniquet, not to apply medical pressure.
- Stop immediately if you feel numbness or pain. Tingling, numbness, sharp pain, or changes in color are signals to stop immediately.
If you’re serious about preparedness, pair this work with proper emergency medical instruction so you understand when and how to use medical tools.
Drill #1 – One-Handed Tourniquet Access Test
This drill checks whether you can reliably reach, grab, and stage your tourniquet with either hand (without looking).
How To Run It
- Start from a neutral stance with your hands relaxed at your sides.
- On a mental cue, access your tourniquet using only one hand.
- Present and stage the tourniquet as if preparing for application (do not apply or tighten).
- Reset to neutral and repeat.
- Run multiple reps before switching hands.
What To Watch For
- Snags: Clothing, belt hardware, or adjacent gear interfering with the draw.
- Grip errors: Missed pulls, partial grabs, or fumbling the tourniquet on presentation.
- Inconsistent draw paths: Your hand taking a different route each rep instead of moving directly to the same spot.
Drill #2 – Med Pouch Access Under Time Pressure
With this drill, you’ll pressure-test how quickly and cleanly you can open your pouch, orient its contents, and pull the item you actually need without relying on sight.
How To Run It
- Set a simple timer or use a verbal cue like “go.”
- Access and open your med pouch.
- Remove one specific item (for example: gauze, a tourniquet, or gloves).
- Pause, then repack the pouch the same way every time.
- Repeat the drill with different items to test your internal layout.
What To Watch For
- Delayed openings: Extra steps, stiff closures, or awkward pull angles.
- Orientation problems: Items coming out upside down or tangled.
- Repack issues: Gear that’s hard to return to a consistent position.
Drill #3 – Movement-to-Access Drill
This one adds light movement to raise your heart rate and show how your setup performs when fine motor skills drop.
How To Run It
Select one movement, then proceed directly to gear access. Example reps to test:
- Short sprint → access tourniquet. Move 10–15 yards at a quick pace, stop, then stage your tourniquet with one hand.
- Kneel, stand → access med pouch. Drop to a knee, stand back up, and immediately open your pouch and retrieve a set item.
- Seated or vehicle-adjacent access. Start seated (or next to a vehicle), then access your tourniquet or pouch without changing position.
What To Watch For
- Loss of precision: Missed grabs or sloppy pulls once your breathing speeds up.
- Access delays: Gear blocked by belt shift, clothing, or body position.
- Retention issues: Items loosening or shifting during movement.
Drill #4 – Low-Light or No-Look Deployment
Low light, an awkward body position, or tunnel vision can take your eyes out of the process. If you have to look down to find a zipper, pull tab, or tourniquet tail, you’re already behind.
How To Run It
- Remove visual input by closing your eyes, turning off the lights, or facing away from your belt.
- On a mental cue, access your tourniquet or med pouch using touch only.
- Present or open the gear as if preparing for use (do not apply or tighten).
- Reset and repeat.
- Run multiple reps before switching gear or access hand.
What To Watch For
- Searching movements: Your hand hovering, patting, or feeling around before committing.
- Re-gripping: Needing to adjust your grip mid-draw to orient the gear correctly.
- Inconsistent indexing: Difficulty finding the same contact point each rep.
How to Evaluate and Adjust Your Setup After Training
After each session, take a minute to walk through these questions while the experience is still fresh.
- Did access feel automatic? Your hand should move without hesitation. If you had to think about where to reach, your placement needs refinement.
- Were movements repeatable? Each rep should look and feel the same. Inconsistent draw paths usually point to unclear indexing or gear crowding.
- Did any gear shift or loosen? Movement shouldn’t cause your tourniquet or med pouch to migrate, sag, or rotate. If so, adjust the mounting tension or positioning before running more drills.
- Did one placement outperform another? If you tested multiple setups, pay attention to which one stayed faster and cleaner as stress increased. The “winner” is usually obvious once movement and time pressure are added.
Train, adjust, and retest until your setup supports you instead of demanding extra attention.
Train the Medical Setup You’ll Actually Use
If your tourniquet and med pouch are easily accessible, stay put while moving, and work the same way every time, you’re building real readiness instead of false confidence.
If you need a better setup, explore Blue Alpha’s belt-mounted medical pouch and tourniquet holder designed for consistent access during training.